Since the release of Envoy v1.1.0, as well as being the easiest way to manage your Passport, Envoy is now a standalone Bitcoin mobile wallet. Now, anyone with an Android or iOS phone can enjoy the simplest Bitcoin wallet experience ever!
There are a number of ways you can setup your Envoy wallet. Newer users will love our simple and automatic setup and backup process, whereas more advanced users might prefer to the manual solution to manage their seed words and wallet data. We have everyone covered.
Upon launch, Envoy only allows for a single mobile wallet per app. We plan to expand this in a later release, but for now, if you want to replace your Envoy Wallet, please follow these steps.
Since Envoy can now store Bitcoin directly on your phone, it is recommended to enable PIN or Biometric authentication from the Settings.
¶ Set Up Envoy Wallet
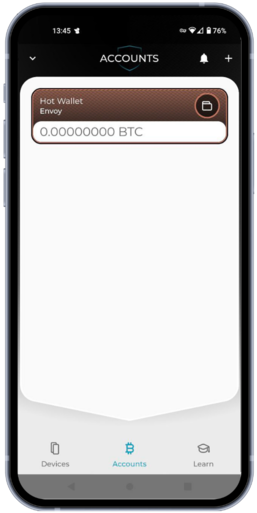
- Upon opening Envoy for the first time, you will be met with the welcome screen. Tap Set Up Envoy Wallet. If you are an existing Envoy user, tap the
+in the top right corner of the Accounts screen, then tap Set Up Envoy Wallet. - Choose your privacy setting. Here you can choose between the following two options:
- Better Performance - Envoy's connection will be fast and reliable with Tor turned off
- Improved Privacy - Tor will be turned on for improved privacy. This can sometimes make Envoy's connection unstable
Envoy users with their own Bitcoin node can connect to it at this stage by tapping 'Add Node' from the top right corner of the screen.
-
After making your privacy setting choice, tap Continue.
-
Choose how you would like to create your Envoy Mobile Wallet. Here you can choose between the following two options:
- Enable Magic Backups - The simplest Bitcoin mobile wallet setup and backup you'll ever experience!
- Manually Configure Seed Words - A more advanced option for users that want to use Envoy as their mobile wallet of choice, but do not wish to leverage Magic Backups. See how to leverage this option here.
- Tap Enable Magic Backups. Envoy will then automatically generate a new mobile wallet, encrypt that wallet seed and upload it securely to your iOS Keychain or Android Auto-Backup.
If you have an existing Envoy Magic Backup, it will be automatically detected and recovered for you at this step.
- If you are an Android user, you will then see an info screen about creating a manual backup from your device's settings. Be sure to complete this step before depositing any Bitcoin into your Envoy wallet! Learn how to do that here.
- Your wallet setup is now complete and you are ready to send and receive Bitcoin!
¶ Android Backup
Android backups are completed automatically, every 24 hours, usually when the device is on charge at night. But to ensure no data is lost after initial set up, it is advised to manually create the initial backup from your device's settings. These steps should be completed only once, immediately after Envoy wallet creation.
As there are many different flavors of Android, the following steps may not exactly match your OS, but the basic steps should be similar.
- Open the Settings app and search for 'Backup'.
- Choose the 'Google' backup option.
- Tap Back up now.
- Depending on how much data is on your phone, the backup process could take a short while
- Once complete, head to the Backup menu in the Envoy settings and check that the Wallet Seed states 'Stored in Android Auto-Backup'
.png)
¶ How your data is stored
Here’s how Envoy Magic Backups work.
1. Envoy generates a Bitcoin seed for your Envoy wallet and stores it on your phone’s secure element.
2. Since most users have iCloud Keychain or Android Auto-Backup enabled, the seed is automatically synced to your other iOS or Android devices – fully end-to-end encrypted, without needing to give Envoy permission to access your iCloud or Google account.
3. Envoy then creates a backup file containing your app settings, account labels, and other non-sensitive app data. We call this the Envoy Backup File. The backup file is end-to-end encrypted with your Envoy seed, meaning Foundation can never see the contents. It does not contain your seed words.
4. The fully encrypted Envoy Backup File is uploaded to Foundation’s servers, alongside a hash of the seed (a cryptographic representation of the seed, not the seed itself!) so that we can ensure no one else can attempt to download your backup without proving knowledge of your seed phrase.
5. There is no Foundation user account – all you need is access to your Apple or Google account and you’re all set.
.png)
¶ iCloud Keychain
iCloud protects your information with end-to-end encryption, which provides the highest level of data security. Your data is protected with a key that's made from information unique to your device, and combined with your device passcode, which only you know. No one else can access or read this data, either in transit or storage. Learn more here.
¶ Android Auto-Backup
Android preserves app data by uploading it to the user's Google Drive—where it's protected by the user's Google account credentials. The backup is end-to-end encrypted on devices running Android 9 or higher using the device's pin, pattern, or password. Learn more here.
¶ Envoy Wallet Magic Recovery
If you lose your phone or delete the Envoy app, restoring your Envoy Wallet takes only a few seconds with our Magic Backup. Here's how you do that:
- Install Envoy and tap Set Up Envoy Wallet on the opening screen.
- Choose your privacy setting and tap Continue.
- Envoy will automatically restore your wallet.
That's it!
Here's what happens under the hood:
- Envoy checks the secure element on your phone and looks for the seed.
- If it discovers a seed on the secure element, Envoy hashes the seed and sends the hash to our server. This only proves your knowledge of the seed and does not reveal your seed itself to Foundation.
- If it does not discover a seed, it downloads the encrypted seed backup from your iCloud Keychain or Android Auto-Backup and restores the seed to the phone's secure element. Envoy then hashes the seed and sends the hash to the Foundation server.
- The server then sends the encrypted Envoy Backup file to Envoy.
- Envoy uses the seed to decrypt the Envoy Backup file locally and restores all user settings, account labels, and other app data, so your Envoy looks identical to the last time you left it.
¶ Manually configure seed words
The following setup options are for users that do not wish to leverage automatic cloud backups and would prefer to manage and/or import their own seed words to Envoy.
¶ Generate New Seed
- Upon opening Envoy for the first time, you will be met with the welcome screen. Tap Set Up Envoy Wallet. If you are an existing Envoy user, tap the
+in the top right corner of the Accounts screen, then tap Set Up Envoy Wallet. - Choose your privacy setting. Here you can choose between the following two options:
- Better Performance - Envoy's connection will be fast and reliable with Tor turned off
- Improved Privacy - Tor will be turned on for improved privacy. This can sometimes make Envoy's connection unstable
Envoy users with their own Bitcoin node can connect to it at this stage by tapping 'Add Node' from the top right corner of the screen.
-
After making your privacy setting choice, tap Continue.
-
Tap Manually Configure Seed Words.
-
The next screen asks if you want to have Envoy generate a new seed, or import your own. Ensure you are in a private location, then tap Generate New Seed.
-
Carefully write down your seed words.
.png)
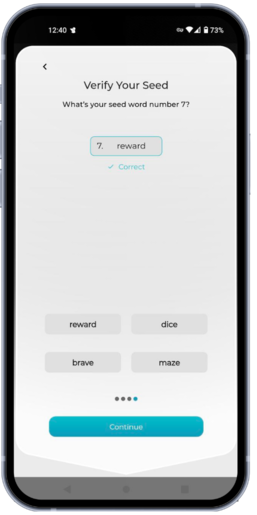
- Envoy then requires you to verify 4 of your 12 seed words. This is to ensure you wrote down your seed correctly. Tap on each word to confirm the selection.
- Envoy then asks you to choose a storage location for your Envoy Wallet Backup file. This file is encrypted by your seed words and can be stored in any location you like. Eg a personal cloud, a microSD card or a USB drive.

- Your wallet setup is now complete and you are ready to send and receive Bitcoin!
It is recommended that you periodically update your manual Envoy backup file to ensure the latest state of your wallets, including accounts, labels and settings, are saved.
¶ Import Seed
- Upon opening Envoy for the first time, you will be met with the welcome screen. Tap Set Up Envoy Wallet. If you are an existing Envoy user, tap the
+in the top right corner of the Accounts screen, then tap Set Up Envoy Wallet. - Choose your privacy setting. Here you can choose between the following two options:
- Better Performance - Envoy's connection will be fast and reliable with Tor turned off
- Improved Privacy - Tor will be turned on for improved privacy. This can sometimes make Envoy's connection unstable
Envoy users with their own Bitcoin node can connect to it at this stage by tapping 'Add Node' from the top right corner of the screen.
-
After making your privacy setting choice, tap Continue.
-
Tap Manually Configure Seed Words.
-
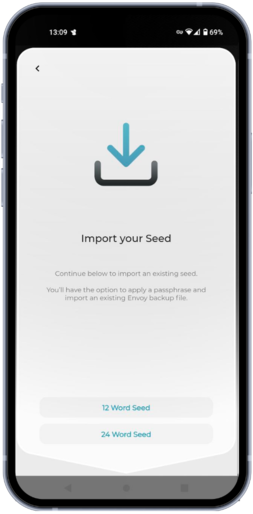
Tap Import Seed.
-
Choose the length of the seed to be imported. This can be 12 or 24 words.
- Carefully enter your seed words.
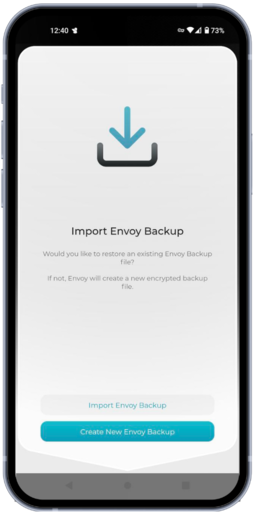
- If importing a seed from an existing Envoy wallet, you now have the opportunity to import the associated backup file from your chosen storage method. If the seed was generated elsewhere and you do not have an Envoy backup file, tap Create New Backup and choose a location for it to be stored. If importing a seed originally created using Magic Backups, Envoy will automatically detect this and ask if you'd like to restore it.
- Your wallet setup is now complete and you are ready to send and receive Bitcoin! Envoy will automatically load any balances and transaction history.
¶ How your data is stored
Choosing either of the manual seed management setups puts you in full control of all data. Your seed words should be stored somewhere secure using a medium that is resistant to theft, fire and water etc.
Your backup file is encrypted with your seed words. It contains app settings, account info and transaction labels, and can be stored anywhere you like. This could be any combination of your phone, a personal cloud server, or on something physical like a microSD card or USB drive.
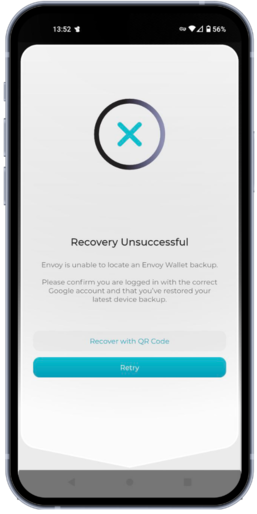
¶ Manual Envoy Wallet Recovery
If you are not a Magic Backup user, there are two ways to recover your Envoy Wallet. The first is to import your seed words and backup file as listed above. This is useful in a scenario where you have completely lost access to Envoy, eg losing your phone.
If you still have access to the phone running Envoy, but want to easily migrate your wallet to a new phone for example, you can follow these steps.
- Install Envoy on the new device.
- Tap Setup Envoy Wallet.
- Choose your privacy setting and tap Continue.
- Tap Set Up Envoy Wallet, then tap Recover Envoy Wallet.
- Envoy will quickly fail to pull your encrypted cloud data (as it does not exist) and offer you the ability to Recover with QR code. Tap that.
- On your existing Envoy wallet, tap the icon in the top left corner of the screen, then tap Backups.
- Ensure you are in a private location, then tap View Wallet Seed.

- On the new phone, in Envoy, scan the QR code being displayed.
- Import your Envoy Wallet backup file from your chosen storage method (if you have one).
- Your Envoy Wallet is now restored onto your new phone and Envoy will automatically load any balances and transaction history.
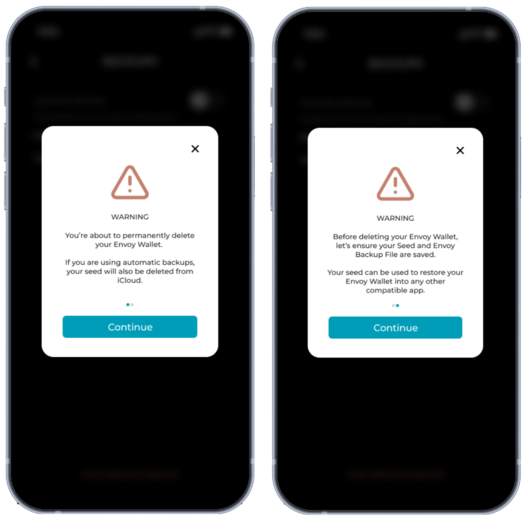
¶ Delete Envoy Wallet
Completing these steps will permanently remove your wallet information from your phone, your chosen cloud storage (if you have one), as well as any encrypted wallet data stored by Foundation. This action will not remove any connected Passport accounts.
- Navigate to Tap the icon in the top left corner of the screen, then tap Backups.
- Tap Erase Wallets and Backups at the bottom of the screen.
- Accept the warning info text.
- If your Envoy Wallet account is not empty, you will be prompted to empty it now. You can choose to do so from the Accounts screen, or Erase the Wallet anyway.
- Next you'll be shown your Envoy Wallet seed and then asked to verify you have backed it up correctly.
- Finally you'll have the option to download your Envoy Wallet backup file. Your backup file is encrypted with your seed words. It contains app settings, account info and transaction labels, and can be stored anywhere you like.
- Accept the final delete screen and your wallet and corresponding data will be erased.